
Open Broadcaster Software is a great multipurpose tool made for recording and streaming. When live streaming or recording, let’s say you need a screenshot. With the traditional screenshot process, if you can’t take an OBS screenshot copy, then you will be looking for – how to make OBS screenshot copy to clipboard. But sadly, the truth is OBS doesn’t allow to take simple method screenshots like the snipping tool or prnt+srcn method.
So, if you are struggling with how to make OBS screenshot copy to clipboard, here we will guide you through the step-by-step process. It will help you to understand the process of creating the screenshot easily with OBS and find solutions for typical issues. Once you know, the process is a breeze.
What is OBS?
The OBS software suite is free and open-source, and it’s commonly used for streaming and recording videos. There are a lot of great features and customizations in OBS, which are available on Windows, Mac, and Linux. It’s usually used for video editing works, as it can record live screens, and it is a popular choice among people like content creators, gamers, educators, and professionals.
As we already mentioned OBS doesn’t have a built-in traditional screenshot-capturing method let’s now go for the details of how to do it.
Step-by-Step Guide To Make OBS Screenshot Copy to Clipboard
So, if you have installed OBS on your pc, you can just go to step two. We added, step one for beginners – from where to download and installation process.
Step 1: Installing and Setting Up OBS
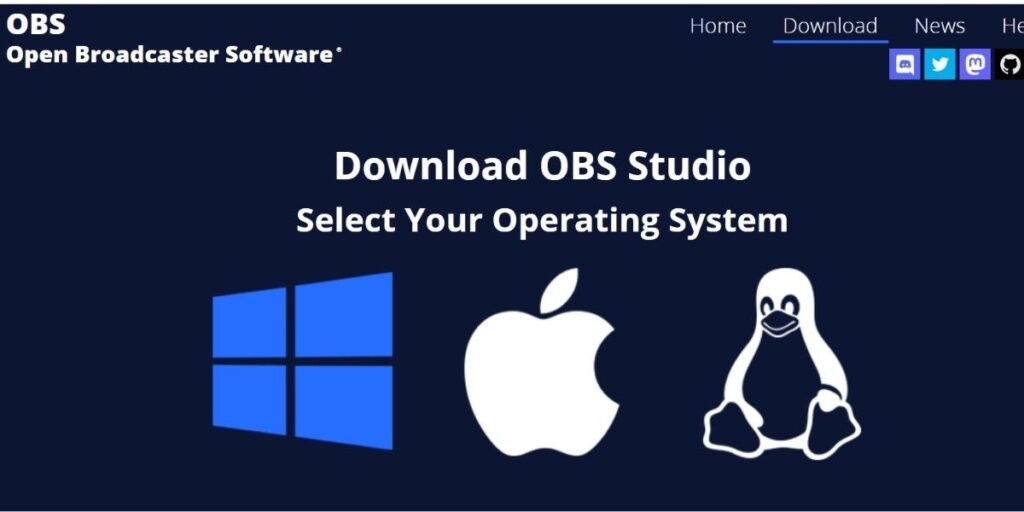
- Download OBS: Go to the official OBS website and download the right installer for your operating system (Windows, macOS, or Linux).
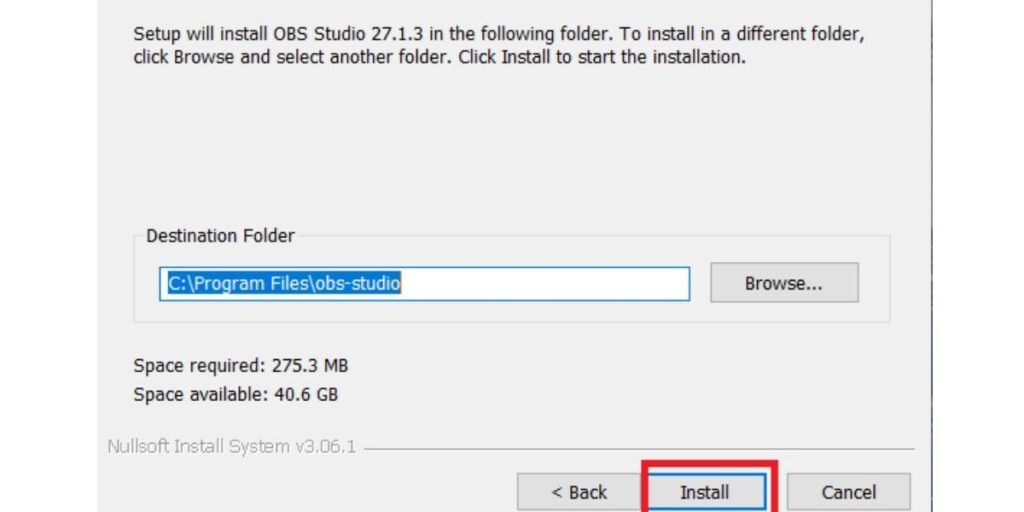
- Install OBS: Now, double-click on the installer and follow the on-screen instructions to complete the installation.
- Initial Configuration: Open OBS and use the auto-configuration wizard to set everything up.
Step 2: Configure Scenes for Screenshots
- Add Scenes: Click the “+” button in the Scenes panel to create a new scene.
- Add Sources: From the Sources panel, click the “+” button within the selected scene. You can choose your preferred source type (e.g., Display Capture, Window Capture).
- Organize Sources: Your screenshots will look better if your sources are arranged and sized properly.
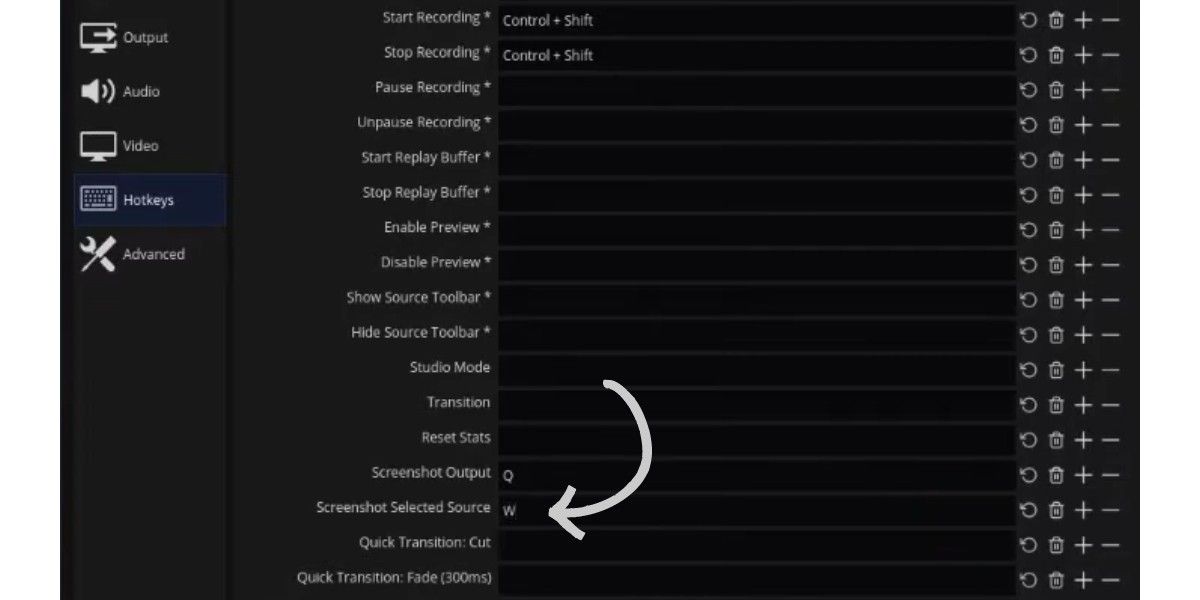
Step 4: Set Up Hotkeys for Quick Screenshot Access
- Open Settings: Click on the “File” menu and then select “Settings”, and click on “Output”.

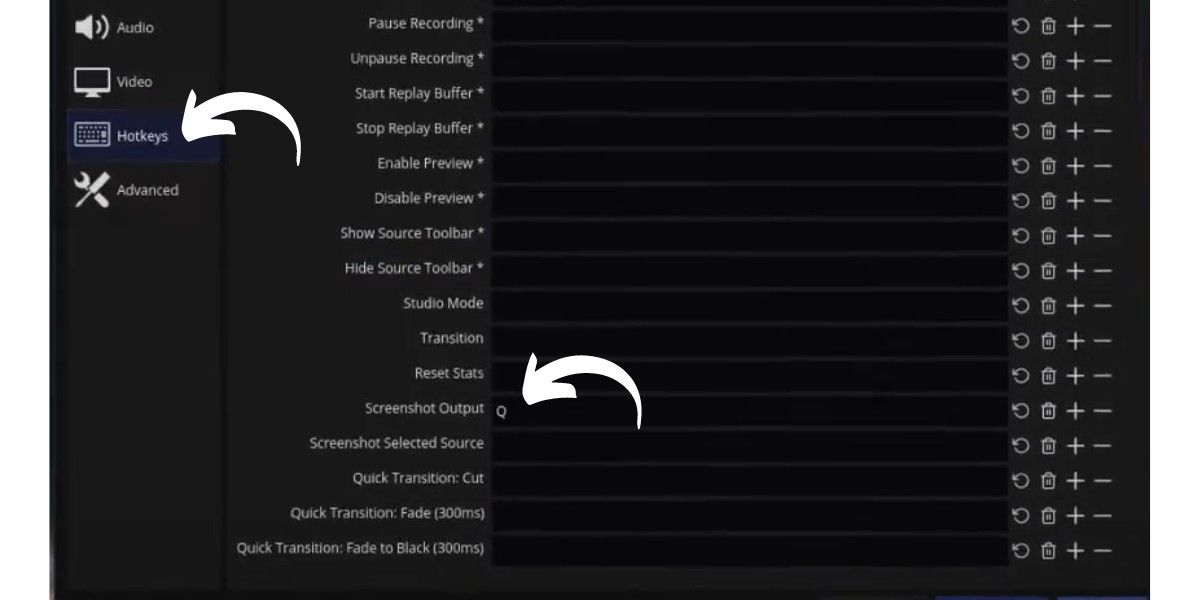
- Go to Hotkeys: Click the “Hotkeys” tab in Settings.
- Add Hotkeys: Now, scroll to find out “Screenshot Selected Source” and click the input field. You can use any combination of keys as a shortcut.
- Apply Changes: Click on “Apply” and then “OK” to save your hotkey settings.
Step 5: Save and Copy Screenshots
- Set the output settings: Go to the “Output” tab in the Settings menu. You can choose where to save screenshots by setting a preferred Recording Path. For example “C:\Users\Your-Pc\Downloads”
- Clipboard Functionality: If you want clipboard functionality, you can also try using third-party software like ShareX or a plug-in that lets you copy to the clipboard directly from OBS.
The screenshot steps end here. If you want to enhance your screenshot quality, the following steps are for additional processes.
Step 6: Optimizing Screenshot Quality
- Resolution Settings: For better quality, adjust the Base (Canvas) Resolution and Output (Scaled) Resolution under “Video”.
- Filters and Effects: Right-click a source and select “Filters” to add enhancements like color correction or sharpening.
Plugins and Additional Tools For OBS Screenshot
We already mentioned in step 6 that, you can use some third-party plugin for taking oBS screenshots. Now, let’s see how you should use plugin.
- Install Plug-in: You can download plugins such as the OBS Screenshot Plugin or Source Copy from trusted sources.
- Configure Plugins: Copy files to the OBS plugins folder according to the plugin installation instructions.
- Utilize Plugins: You can access and configure these tools within OBS to expand its screenshot capabilities. They can also be copied directly to the clipboard.
Troubleshooting Common Issues To Make OBS Screenshot Copy to Clipboard
Sometimes, you can face some issues, if the steps or process are not done accordingly. Let’s see some of them –
Screenshot Not Capturing
- Check Hotkeys: After setting hotkeys if you can not take a screenshot, just check again if hotkeys are correctly set or not.
- Source Visibility: When your screen is not set in the right place, your screenshot is not the one you want. So, first set the screen you want to take a screenshot and make sure it is visible in the OBS preview window.
Clipboard Issues
- Permissions: On some systems, OBS may require administrative privileges to access the clipboard. So, use it as the admin user, if that kind of message shows.
- Clipboard Compatibility: Make sure the file type you are copying can be pasted onto your clipboard. Normally, this problem doesn’t occur but if something happens, you can also check this.
What Are The Use Cases for OBS Screenshots?
So, when do you need to take screenshots? Yes, of course when you need that screenshot content to show something to others.
- Content Creation: You can use screenshots for thumbnails, promotional materials, or instructional guides.
- Educational Use: You can capture specific scenarios or problems to illustrate solutions in tutorials.
- Professional Settings: For document workflows, presentations, or software demonstrations.
Advanced Settings for High-Quality OBS Screenshots
When it comes to capturing a screenshot using OBS, “resolution settings” and “filters” can do a lot in order to make the screencap as high quality as possible. For example:
Resolution Settings
- I highly recommend setting your Base [Canvas] Resolution to the exact one of your monitor.
- Your Output [Scaled] Resolution is the actual size of your screenshot; consider using it.
- 4K is the best for its highest image resolution and is suited for the most detailed images used in professional presentations.
- 1080p resolution is the most optimal option for sharing screenshots on social media; the screenshots will still be of a high quality.
- 720p: If you need a small file size specific to Instagram, don’t choose resolutions that are beyond 720p. Because for short reels the extra image quality would be pointless.
Filters and Effects
Among the high-quality settings, here are a few filters you can also use in order to upgrade your screenshot:
- Sharpening: Sharpening is used to make the image clear and easy on the eyes, as it increases the contrast and distinctly defines its edges. It is especially relevant in aircraft and city photography when an object is zooming through your frame.
- Color Correction: Color grading is used to change the image’s brightness, contrast, and saturation in order to slightly improve it.
Lastly, if your image is looking too dark, go to Filters – Color correction – Gamma adjustments. You can change the Ee or lighten the Shine.
FAQs
1. How to change OBS screenshot location?
To change the screenshot location in OBS follow the below steps:
- Open OBS and go to the Settings menu (click on “File” > “Settings”).
- In the settings window, select the Output tab.
- Under the Recording section, find the Recording Path field.
- Click Browse, and choose your preferred folder for saving screenshots.
- Click Apply and then click OK to save the changes.
Your screenshots will now be saved to the specified folder.
2. Where are my OBS screenshots?
Screenshots are normally saved to the output path set in OBS’s Output settings. This location is in your Documents folder under a subfolder called OBS Studio.
To find your screenshots:
- Open OBS and click on File > Settings.
- Go to the Output tab and look for the Recording Path.
- You can see or change this path, which tells you where your screenshots are saved.
If you are using plugins or changed settings, the location may not be the same as above. So it’s best to check the Output settings in OBS to get the right folder path.
3. Where is OBS cache stored?
OBS or Open Broadcaster Software does not have a cache similar to that of a web browser. However, it has temporary folders for managing the program, mostly during recording and livestreaming. Where you can generally find these files:
Default Locations:
- On Windows: Temporary files might be stored in the C:\Users\<Your Username>\AppData\Roaming\obs-studio\.
- On macOS: Look in ~/Library/Application Support/obs-studio/.
- On Linux: Check ~/.config/obs-studio/.
OBS Settings:
- Scene collections and settings cached files can also be found in the OBS configuration directories.
If you want to know more about how to take screenshots on different devices, you can check the following articles.
How to screenshot one monitor in Windows 11
How to screenshot gateway laptop
How to see screenshots from FTB Minecraft
How to screenshot in Windows Valorant
Wrap-Up on How to Make OBS Screenshot Copy to Clipboard
So, that’s all from the query of how to make OBS screenshot copy to the clipboard. As we are living with digital gadgets and AI life everyday, most of the users know this process. But somehow, if you are someone new and having a problem, we hope this post helps you. Video solutions are more effective for some users, and there are many video tutorials, you can check them to solve this challenge.